
The Vortex Particle Wake
Updated September 22, 2020
Step by step tutorial
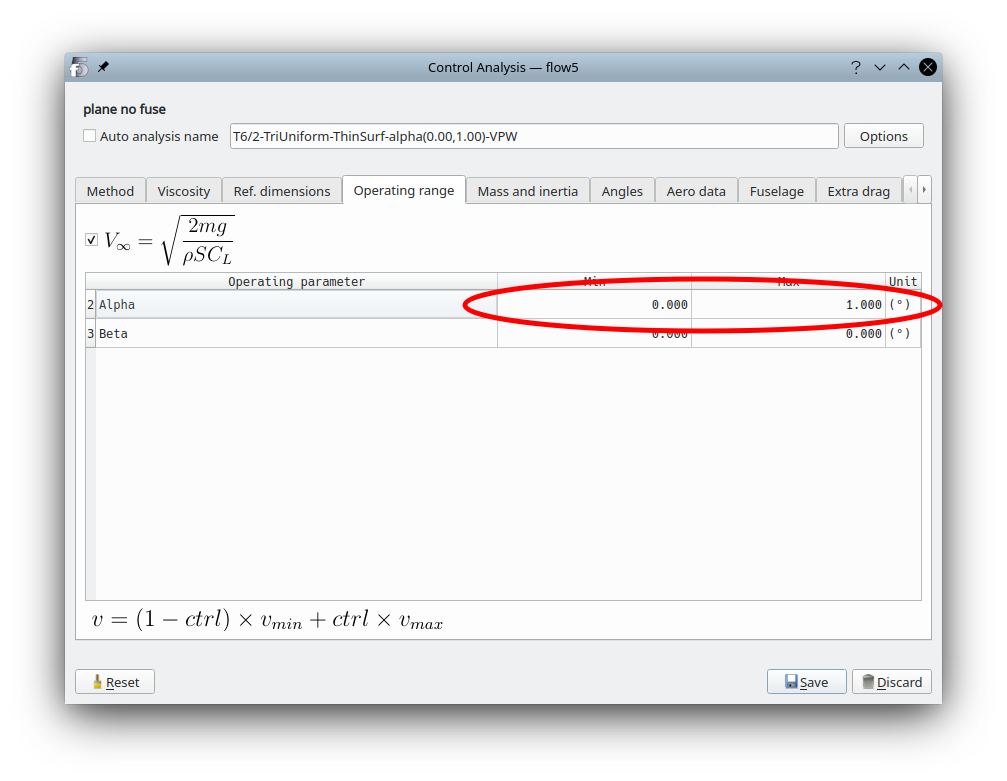
- Define a T6 control analysis and define the operating range. Setting the a.o.a. range between 0 and 1 means that the control parameter can be read directly as the angle of attack.
- Define the vorton wake in the last tab.
Click on the link to view the recommendations for the parameters.
If unsure, set the vorton core size to the MAC's length.
The number of iterations should be sufficient for the wake to extend to a sufficiently long distance downstream, and for the end vortons which were the firs to be generated to be discarded. With the settings in the image below:- the first vortons will reach the milestone of 30 MAC after 30 iterations since the streamwise step is a constant 1 MAC,
- the last 5=35-30 rows of vortons will be discarded since 35 iterations are requested.

- Save the analysis and select it
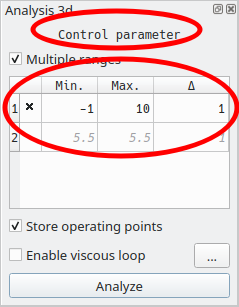
- Set the control parameter's range, here from -1 to 10 by increments of 1; activate the desired range by clicking in the first column.
To improve the chances of convergence, it is recommended not to activate the viscous loop.
-
Run the analysis.
As of beta15, the visualization of the VPW's development during the analysis has been disabled tue to thread conflicts between the analysis and GUI modules.
The iterations for a given value of the control parameter can be interrupted if it is deemed that the roll-up has reached a stabilized state. Results will be saved and the analysis will continue with the next value of the control parameter.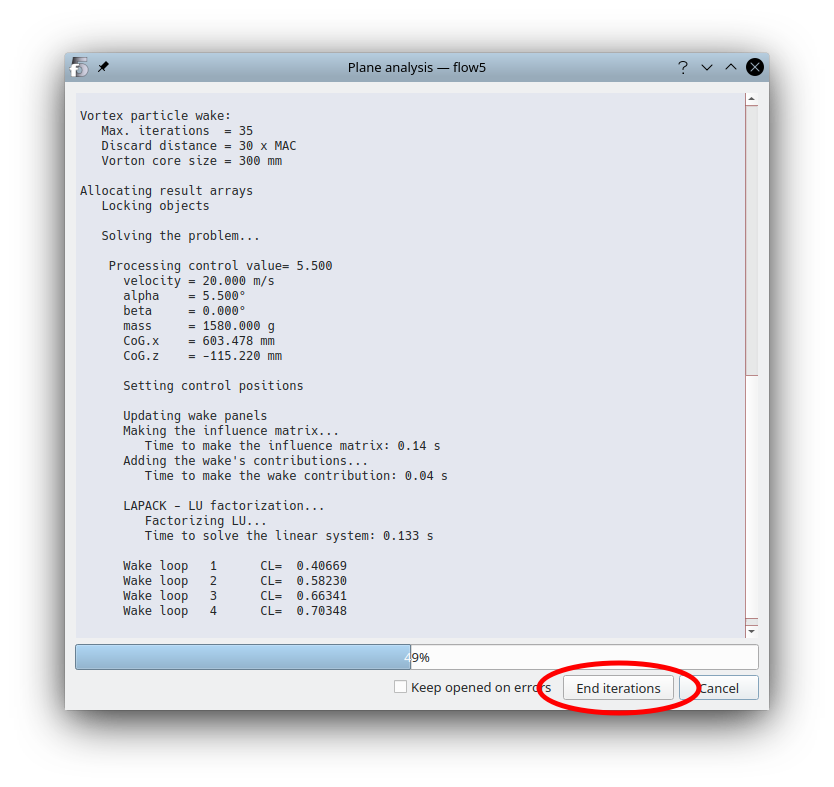
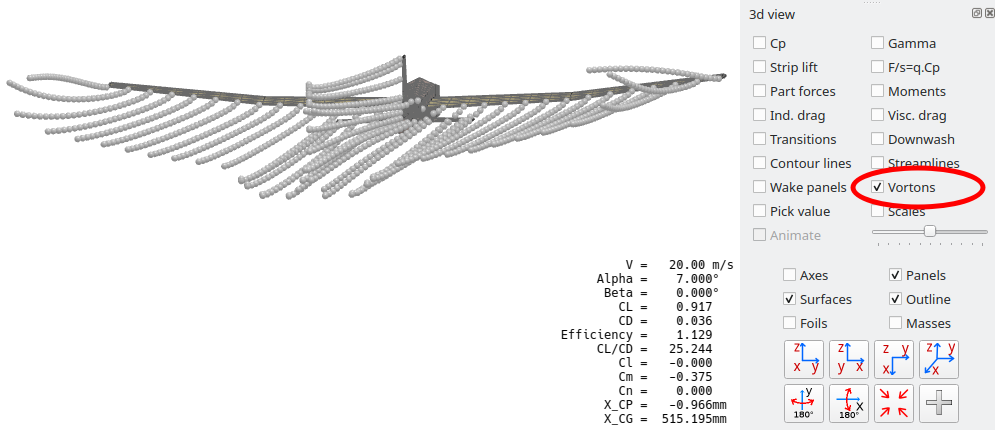
- Go to the 3d view, activate the display of vortons. The main thing here is to check that the roll-up is smooth.
-
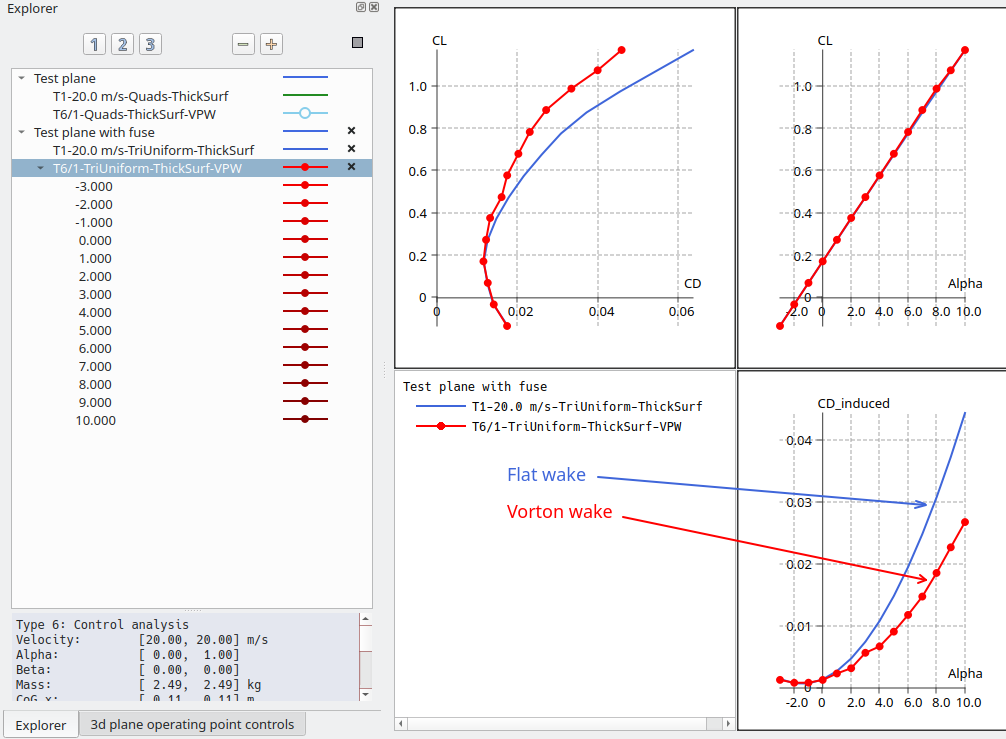
Check the results in the polar graphs. If the polar curves exhibit irregularities, modify the parameters as explained in the recommendations.
Back to top